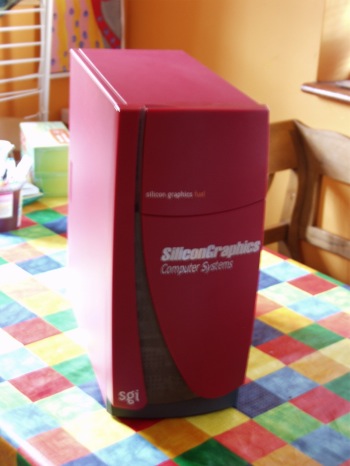
The Fuel is Silicon Graphics’ last MIPS based entry level graphics workstation. Like it’s bigger brother the Tezro, it’s based around the updated innards of the Origin 3000 machines – in the same way the Octane used the same innards as the Origin 2000.
The family lineage goes like this:
Origin 3000 -> Origin 300 -> Tezro -> Fuel
Origin 2000 -> Origin 200 -> Octane
The advantage this gives the Fuel is much faster memory bus speeds, as well as multiple PCI channels and faster throughput to the graphics card. Unless you need multi-CPUs, you’ll find Fuel faster than Octane. Taking into account the cost of an Octane2 with a V10 board set, the Fuel represents a massive bargain right now.
SGI sold the Fuel with no sound card, providing extra cost options of either a PCI based card, or a USB sound system. This does actually make sense, if you think about Fuel’s target CAD and graphics markets – cut the cost of manufacturing by pulling out parts that aren’t used by the majority of the client base.
My current problem was two-fold:
- I want to get one of my 1600SW screens wired into my Fuel
- I want some sound on the Fuel as well
Solution to problem number one is to buy a Niktec GFX-1600SW. It takes up a single PCI slot for power (so no drivers needed) and converts DVI to OpenLDI. It’s a nice neat internal solution that’ll work on anything with a spare PCI slot.
Solution to problem number 2 is to purchase a Soundblaster Audigy 2 ZS. This is supported natively under IRIX, and is much much cheaper than the other supported sound options for SGI gear.
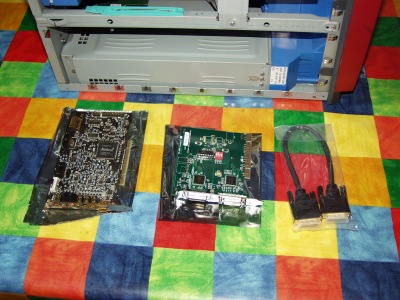
SoundBlaster Audigy 2 ZS, GFX-1600SW, DVI->DVI cable
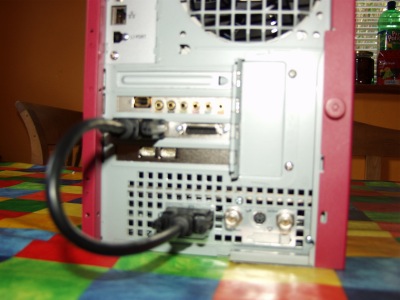
Total time to plug everything in was under 5 minutes – the Fuel is very very easy to get into.
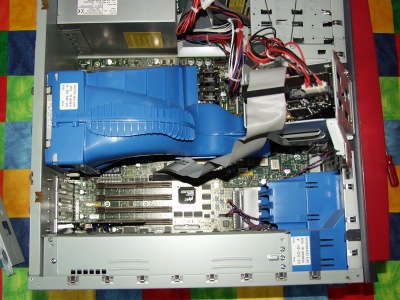
Note the blue vent in the middle for cooling RAM and CPU
The only issue I faced was that I’d forgotten to reconfigure the X server before shutting down the machine. The configured resolution was 1900×1280, for the 24″ CRT I had plugged in before. This would clearly not work with the 1600SW.
The easiest option to this was to hit ESC once the Fuel had started booting, to drop into the graphical PROM menu. The default graphics settings appear to be 1024×768, and these can’t be changed, so no matter what you have plugged into a Silicon Graphics machine, you should always have something displayed during power on.
From the main PROM menu I entered the PROM monitor, then typed single and hit enter. This tells the machine to boot IRIX, but drop into single user mode. You just then need to enter the root password when prompted, and you have a root login in single user mode.
Reconfiguring the X server was then as straightforward as entering:
/usr/gfx/setmon 1600x1024_60
Answer No to whether or not you want this as the power on default. Remember, you can’t change that, and trying to will cause setmon to error out. Once setmon has done it’s magic, just type reboot, and wait for the machine to restart.
The graphical login window should pop up and you’ll be able to login to X with the new resolution fitting nicely on your 1600SW.
We can check the graphics board set configuration from the command line using the gfxinfo command:
valaraukar # /usr/gfx/gfxinfo
Graphics board 0 is "ODYSSEY" graphics.
        Managed (":0.0") 1600x1024
        BUZZ version B.1
        PB&J version 1
        32MB memory
                Banks: 2, CAS latency: 3
         Monitor 0 type: UFC 0
        Channel 0:
         Origin = (0,0)
         Video Output: 1600 pixels, 1024 lines, 60.00Hz (1600x1024_60)
Here’s the output from hinv after the hacking about:
valaraukar # uname -a
IRIX64 valaraukar 6.5 01090133 IP35
valaraukar # uname -R
6.5 6.5.29m
valaraukar # hinv
1 600 MHZ IP35 Processor
CPU: MIPS R14000 Processor Chip Revision: 2.3
FPU: MIPS R14010 Floating Point Chip Revision: 2.3
Main memory size: 1024 Mbytes
Instruction cache size: 32 Kbytes
Data cache size: 32 Kbytes
Secondary unified instruction/data cache size: 4 Mbytes
Integral SCSI controller 2: Version IEEE1394 SBP2
Integral SCSI controller 0: Version QL12160, low voltage differential
  Disk drive: unit 1 on SCSI controller 0
Integral SCSI controller 1: Version QL12160, single ended
  CDROM: unit 6 on SCSI controller 1
IOC3/IOC4 serial port: tty1
IOC3/IOC4 serial port: tty2
IOC3 parallel port: plp1
Graphics board: V10
Integral Fast Ethernet: ef0, version 1, module 001c01, pci 4
Iris Audio Processor: version EMU revision A4, number 1
DMediaPro DM10 FW option: unit 0, revision 1.1.0
USB controller: type OHCI
You can see the Soundblaster Audigy 2 ZS card is recognised by the Iris Audio Processor driver – no messing around needed.
Again, none of this required any fiddling with drivers or messing around – you should be able to cheaply add sound to your Fuel in 10 minutes or less, and I picked up the Soundblaster Audigy 2 ZS card for £19.